Custom made scrub caps for surgeons is a huge deal!
When my daughter asked me if I was serious about making a cool scrub cap for her and I first started looking for a pattern or a tutorial of sorts online on how to make a scrub cap, I did not find a really well done one - it was bits and pieces here and there.
I finally came across a good pattern, and modified it to match my girl's wishes (elastic band in the back and a tight fit).
Want my printable to scale pattern? - It is available
(All my patterns print on letter size and A4 paper and come with detailed instructions how to make the scrub caps. Video instructions are available too.All sales are final, no returns.)
I made a scrub cap for her (you'll see it at the end of this page) and I decided to publish my own tutorial here on my blog. There's a video at the bottom of this page too.
If you want to zoom on the pictures, click them, and they will enlarge.

You will need:
- Paper to make the pattern – all measurements are in inches
- 9 inches of cotton fabric – standard 44 inch width
- 3 inches of elastic band
- Black and red thread
Follow the steps below in exact order:
1. Wash, dry and iron fabric before you start cutting – it will shrink
2. Make your paper pattern according to measurements below:

3. Cut your pattern out, fold your fabric so you have two layers under the side part of your cap and single layer under the top of your cap.

4. Once you cut your fabric, make sure to mark where you will connect top part of cap to side part of your cap in the back.


I used pins to mark where I will connect the top part of my cap to the side part of my cap in the back on both ends of the side part of my cap

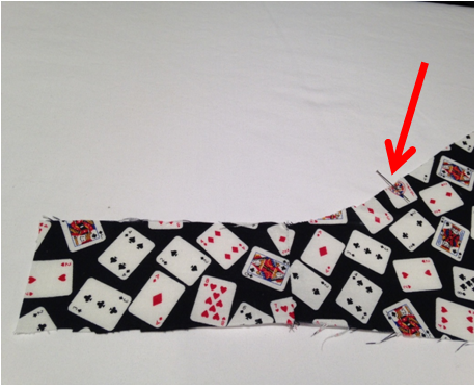
5. Use hot iron to fold the curved edge of the side part one time, beginning at your pins and to the ends of side of cap part of your cap.


6. Use hot iron to fold the curved edge the second time, beginning at pins in wider part and ending at beginning of straight end on both sides of side of cap part.


7. Use hot iron to fold the edge at both short sides of straight ends and bottom of side part of your cap.


8. Use zigzag stitch to secure curvy parts of your side piece between the pins.


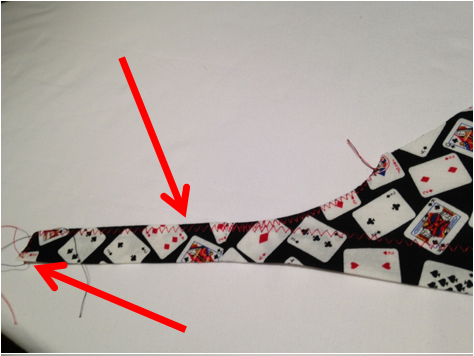
9. Use hot iron to fold bottom of side part of your cap toward wrong side of fabric making sure your ends are folded in two and edges are aligned.


10. Use zigzag stitch to sew edges of ties of your cap together and bottom fold of your cap to the side part of your cap, starting at one end, going along the bottom of the cap and ending at the other end.
I use zigzag stitch because it will not break when my surgeon pulls on ends of his cap to tie the cap in the back in a hurry


11. Use hot iron to fold the bottom of top part of your cap first one time, then the second time to create a tube for elastic band.


12. Use straight stitch to make a tube for elastic band.

13. Cut 3 inches of elastic band and attach a safety pin to one end of it – next step is to secure elastic band inside the tube of fabric.

14. Stick elastic band (safety pin first) into the fabric tube and move it toward the other end. When the end of elastic will align with end of your fabric tube, secure it with a pin.

15. When your safety pin is out of the fabric tube and the second end of elastic band aligns with the end of fabric tube, secure elastic band with a pin.

16. Once both edges of your elastic band are secured with pins, remove safety pin.

17. Fold the top of your cap part in two length wise, find the middle and mark it with a pin.
Then fold the side part of your cap in two width wise, find the middle and mark it with a pin.

18. Put the top of cap part and the side of cap part together face to face and align the middle pins. Pin top part and side parts of your cap together in that point.

19. With side part of your cap being on top, pin it to the top part of your hat. Pins should be ¾ of an inch apart.

20. Use straight stitch ¼ inch from the fabric edge to connect the top part of your cap and the side part together – side part is on top. Pull pins out before they reach the needle. Use your fingers to hold fabric in place and together.

21. When you finish the straight stitch, flip the cap over, change settings to zigzag and stitch around the top of hat – keep your needle on the fabric.

Do zigzag stitch all the way around the connection of top and side parts of the cap.

When you finish zigzag stitch, tie the ends of your threads into a knot and hide the tails into a seam using a hand needle – that’s how I do it.

22. Use hot iron to iron the seam toward the side part of your cap.

23. Starting at elastic band, make a decorative finishing stitch along the seam which connects top part of the cap to the side part of your cap.

Congratulations! This is your finished cap – this is how the back of your cap looks with ends tied together.
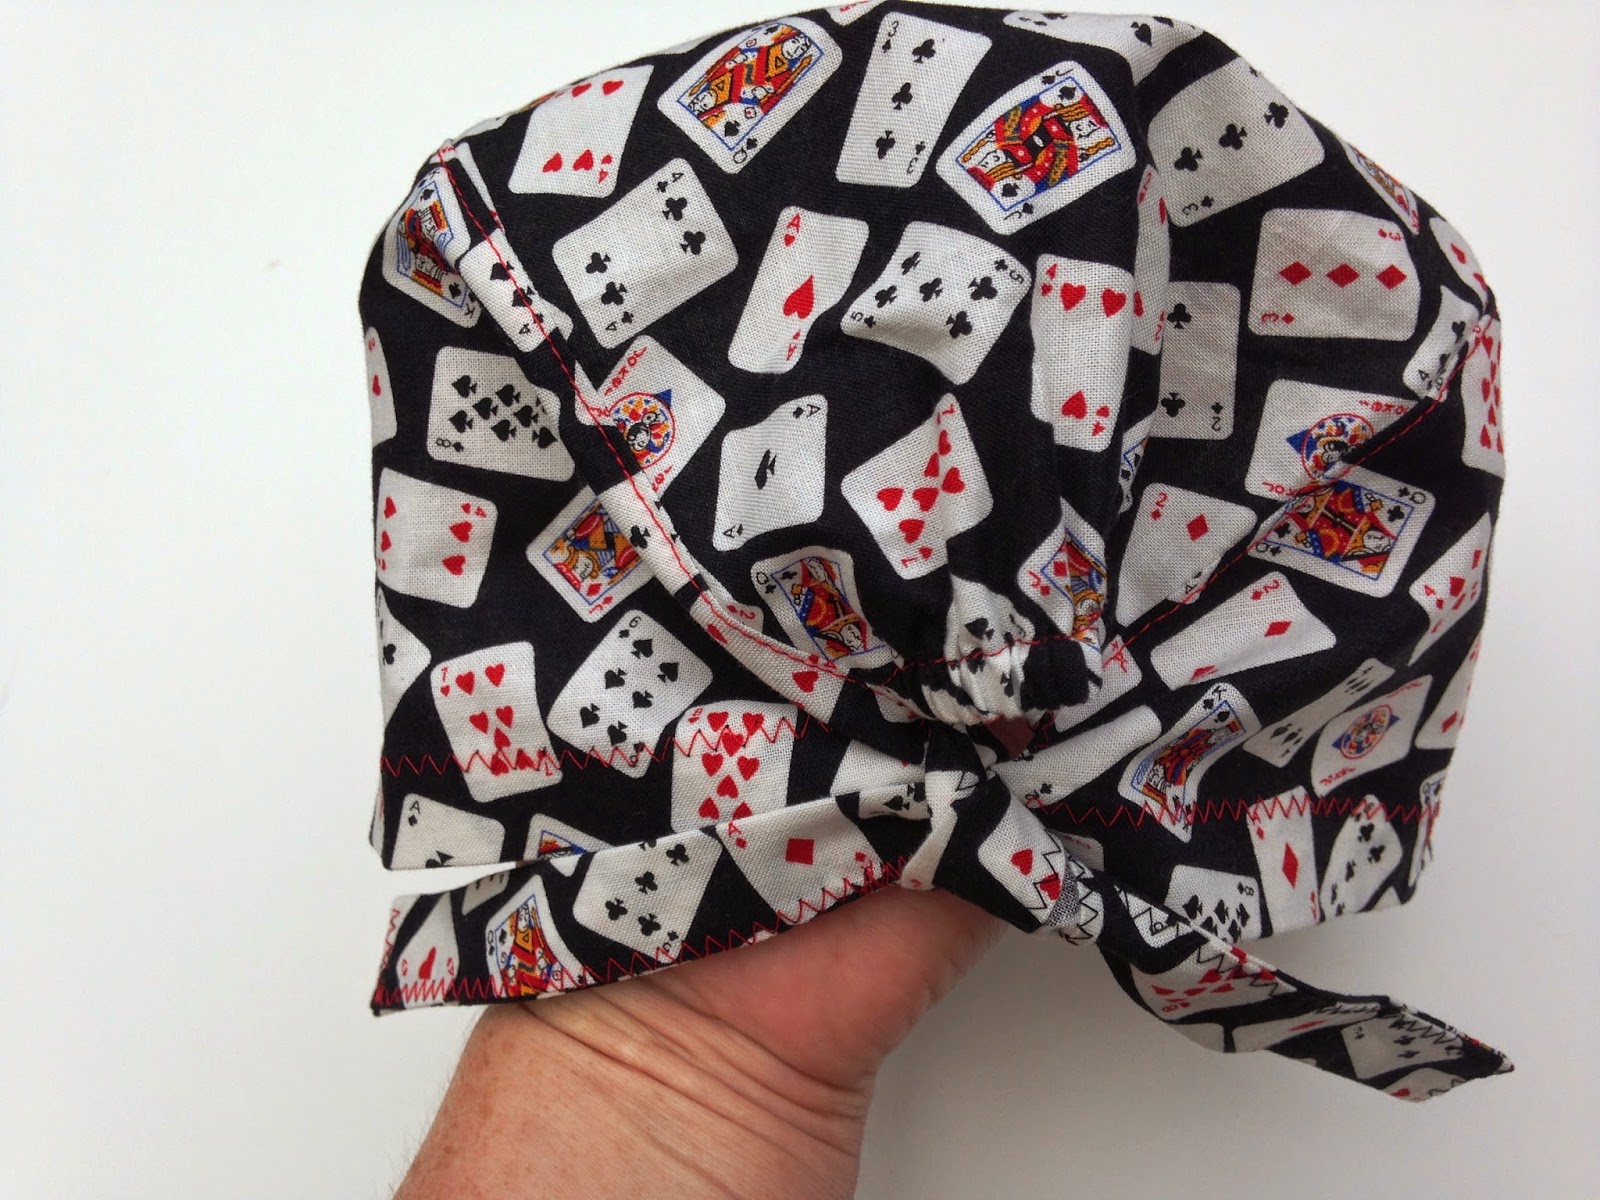
This is how my cap looks in the front.
This cap is for sale - click the picture, get in touch with me by e-mail to place your order!

I promised you a picture of my daughter's scrub cap - here it is!
Want a printable pattern for this scrub cap?


I used your pattern, and it worked out great. Thanks!
ReplyDeleteI am glad it did! :-)
DeleteI ordered the pattern through paypal but have not recieved it
ReplyDeleteJust sent it
DeleteI know. I need an email to send it, but have not received an email with it from PayPal yet. larissa.fontenot@gmail.com
ReplyDeleteI ordered this pattern but have not received it. Laconic_caterpillar@Hotmail.com
ReplyDeleteI'm wondering if you could share the final dimensions of this cap? I'm worried I might need to size it up and I'm not familiar enough with making hats to know exactly what needs adjusted.
ReplyDeleteHow long does it take to receive the pattern? I just ordered it but have not received it yet.
ReplyDeleteI just ordered it can you please send it. Thank you
ReplyDelete